The next part of this migration is something that is a LONG time coming, replacing Evernote. However, this isn’t quite a migration. I had stopped using Evernote a few years ago, when I had switched my daily driver to Linux. Most of my data that was previously in Evernote, I had exported to folders in my Dropbox, but while I kept it, I didn’t really use it anymore.
Most of my note taking has reverted to just text files that reside spread across my Documents directory, and I have no good way of organizing them.
QOwnNotes
QOwnNotes is a nice, cross-platform note taking application that integrates with the NextCloud Notes application. It supports Markdown, which I have become a fan of the more I use GitLab/GitHub and Ghost. It gives you the ability to tag notes, search them, has quick, customizable shortcuts, and has some scripting ability (which I haven’t dug into yet.)
QOwnNotes can work without a NextCloud integration, and you can use it with just about any syncing application, Dropbox, SeaFile, Syncthing, etc. Honestly, I wish I had looked at this sooner.
Setup
NextCloud
You do need a working NextCloud setup, you can see how I did mine in this post. To setup note taking integration, you first need to enable the Notes application within NextCloud.
Go to Apps, the the “Office and Text” category, and click the ‘Enable’ button under the Notes app.
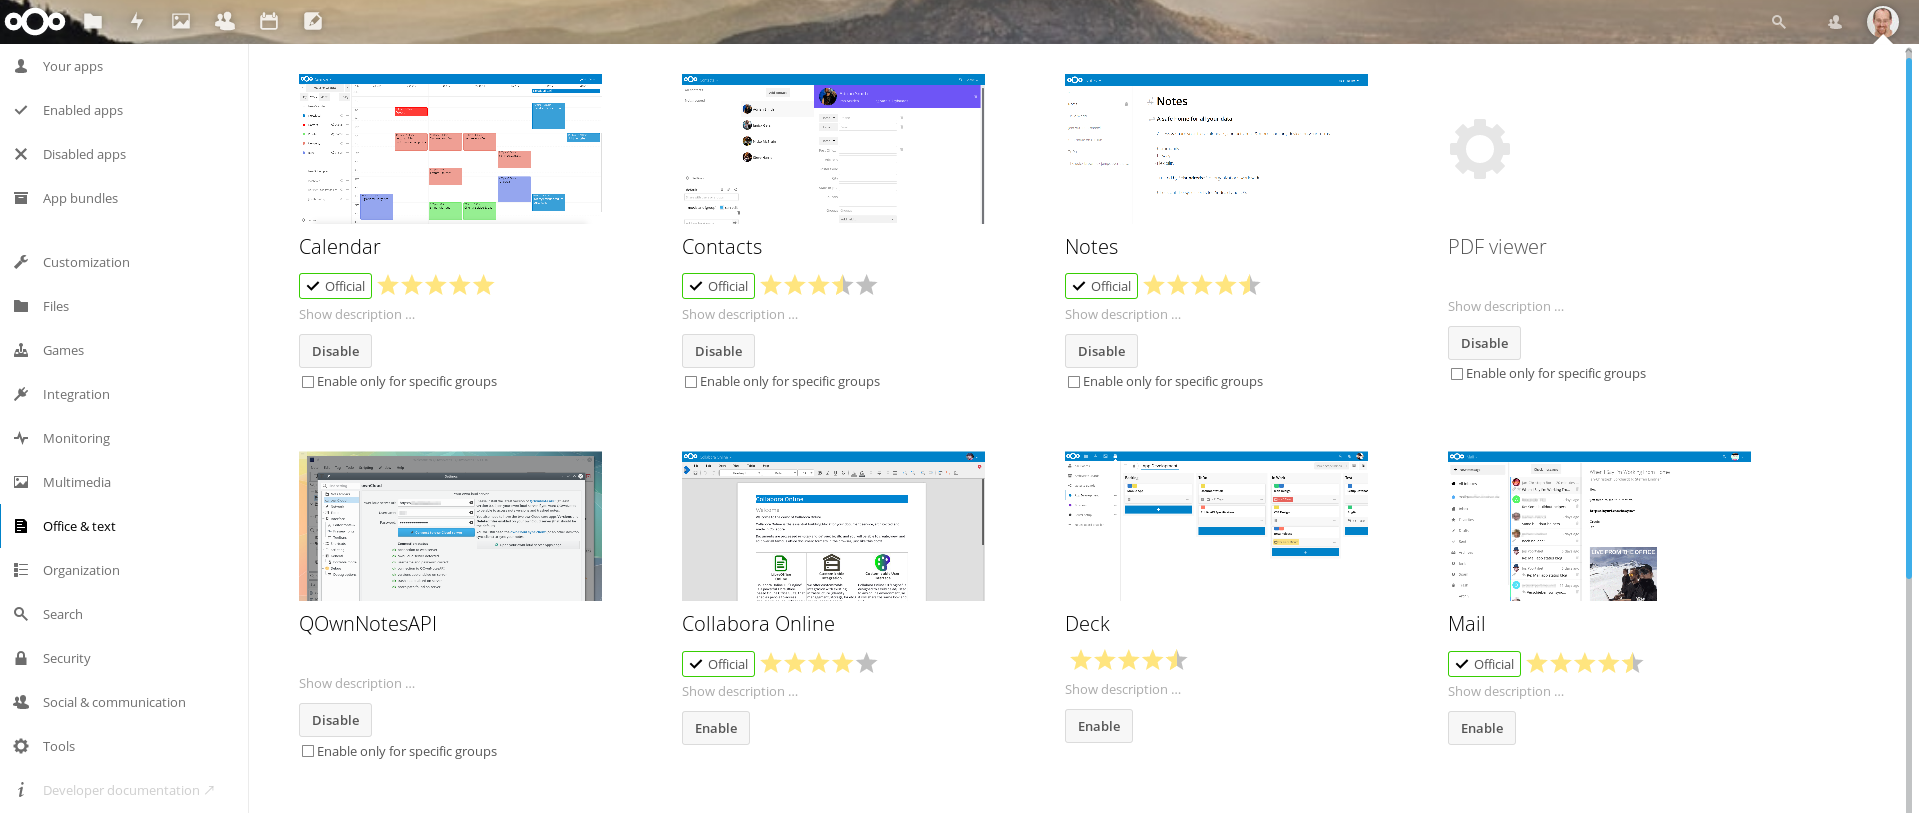
You should see the Notes icon with your apps.

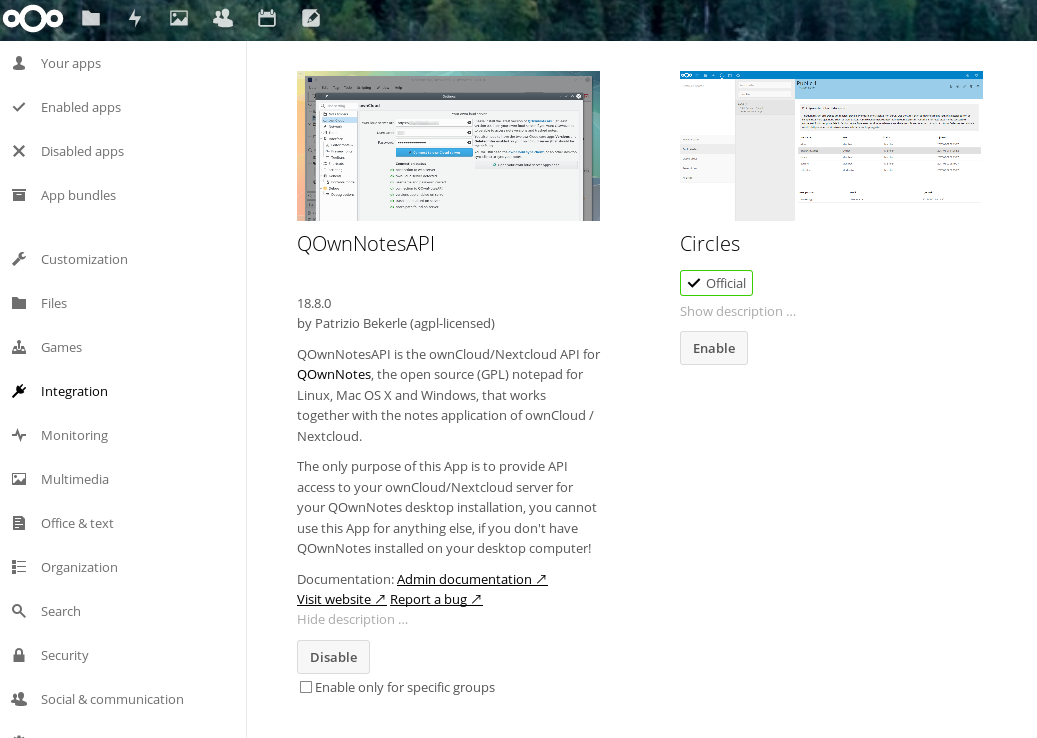
Next, enable the QOwnNotes API integration within NextCloud. Go back to Apps and select the “Integration” category. Enable the QOwnNotesAPI app.
Now, you should have the Notes app and a Notes directory. You can start creating notes now within NextCloud.
QOwnNotes
The setup of QOwnNotes is very easy, as the developer has created a snap package.
$ snap search qownnotes
Name       Version  Publisher  Notes  Summary
qownnotes  18.08.9  pbek       -      Plain-text file notepad with markdown support and ownCloud / Nextcloud integration

$ snap install qownnotes
qownnotes 18.08.9 from 'pbek' installed
Now I can launch QOwnNotes from the application launcher and get into the configuration screens.
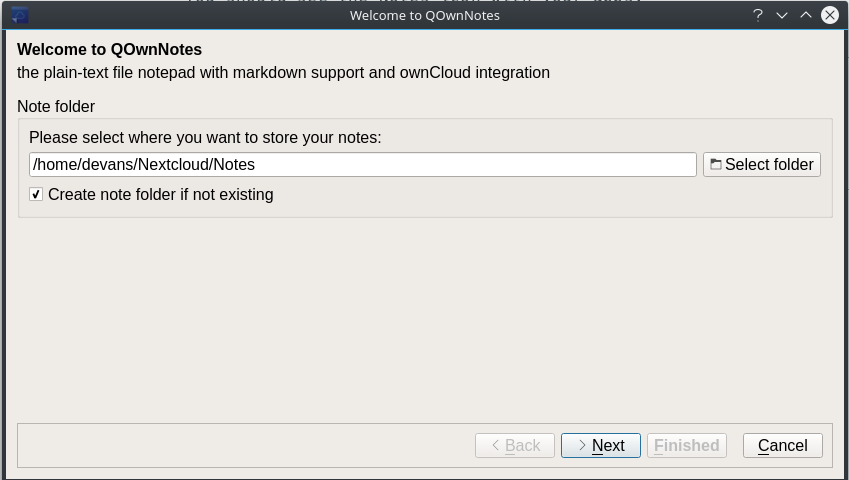
The screen above caused me a bunch of confusion, that I admit took my WAY too long to figure out. I assumed it was detecting my NextCloud directory, and found my Notes folder. However, my NextCloud folder is “NextCloud”, with a capital ‘C’, the path above has a lowercase ‘c’. The Create folder check box is checked by default. So when I clicked through here it created a different Notes folder. It took me a while to figure out why my notes were not syncing to my NextCloud instance.
TLDR; make sure you pick the right folder.
Next, is a dialogue box to setup your NextCloud Server settings.
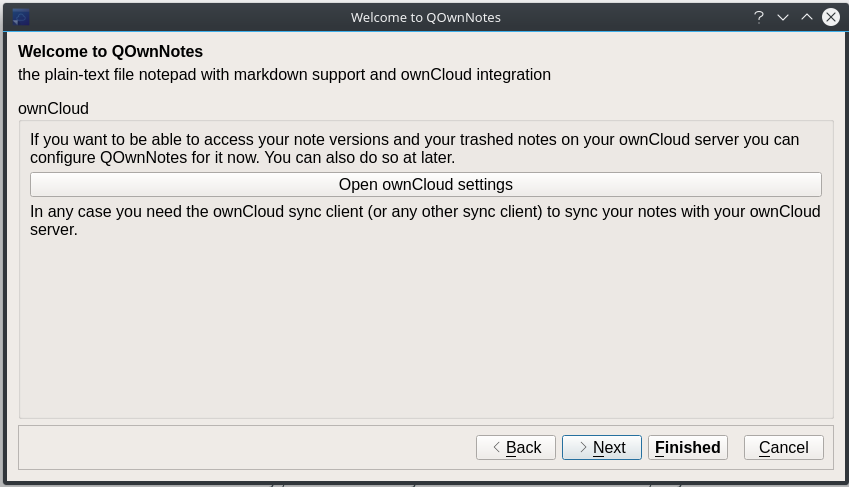
Click the settings button, enter your NextCloud connection info, and click the “Connect to oC/ NC Server”. Back on the previous screen click ‘Finish’.
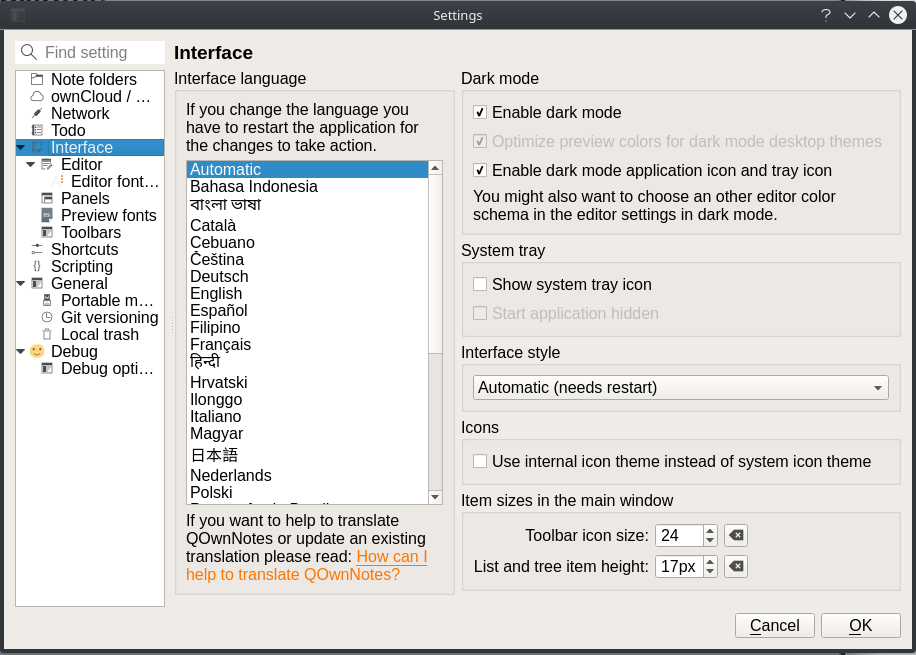
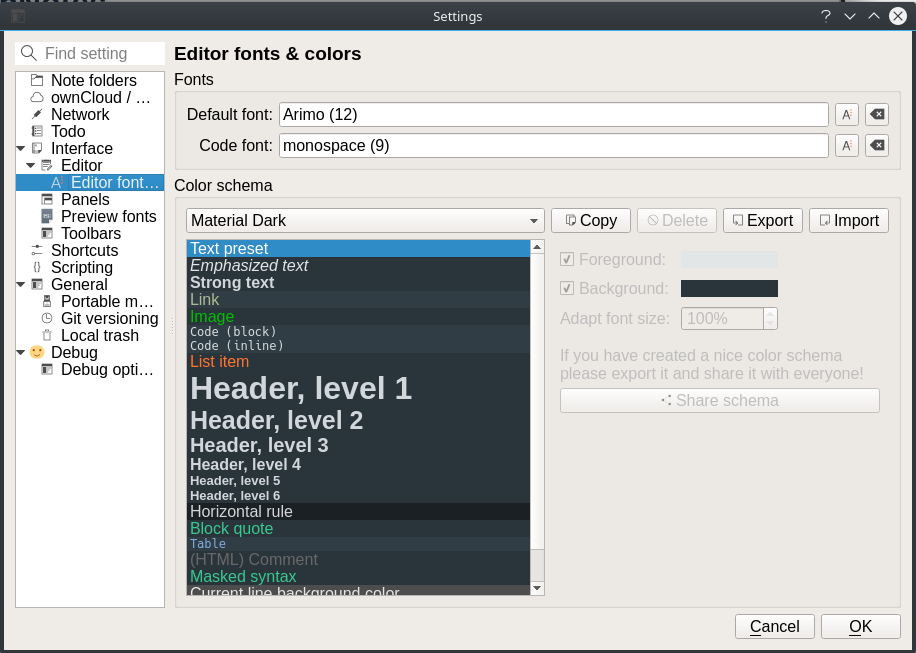
Out of the box, QOwnNotes looks like an app from the 90s, but you adjust the appearance. Under Notes menu, select Settings. I chose the Dark Mode from the Interface menu, and Material Dark color schema from the Editor Font menu.
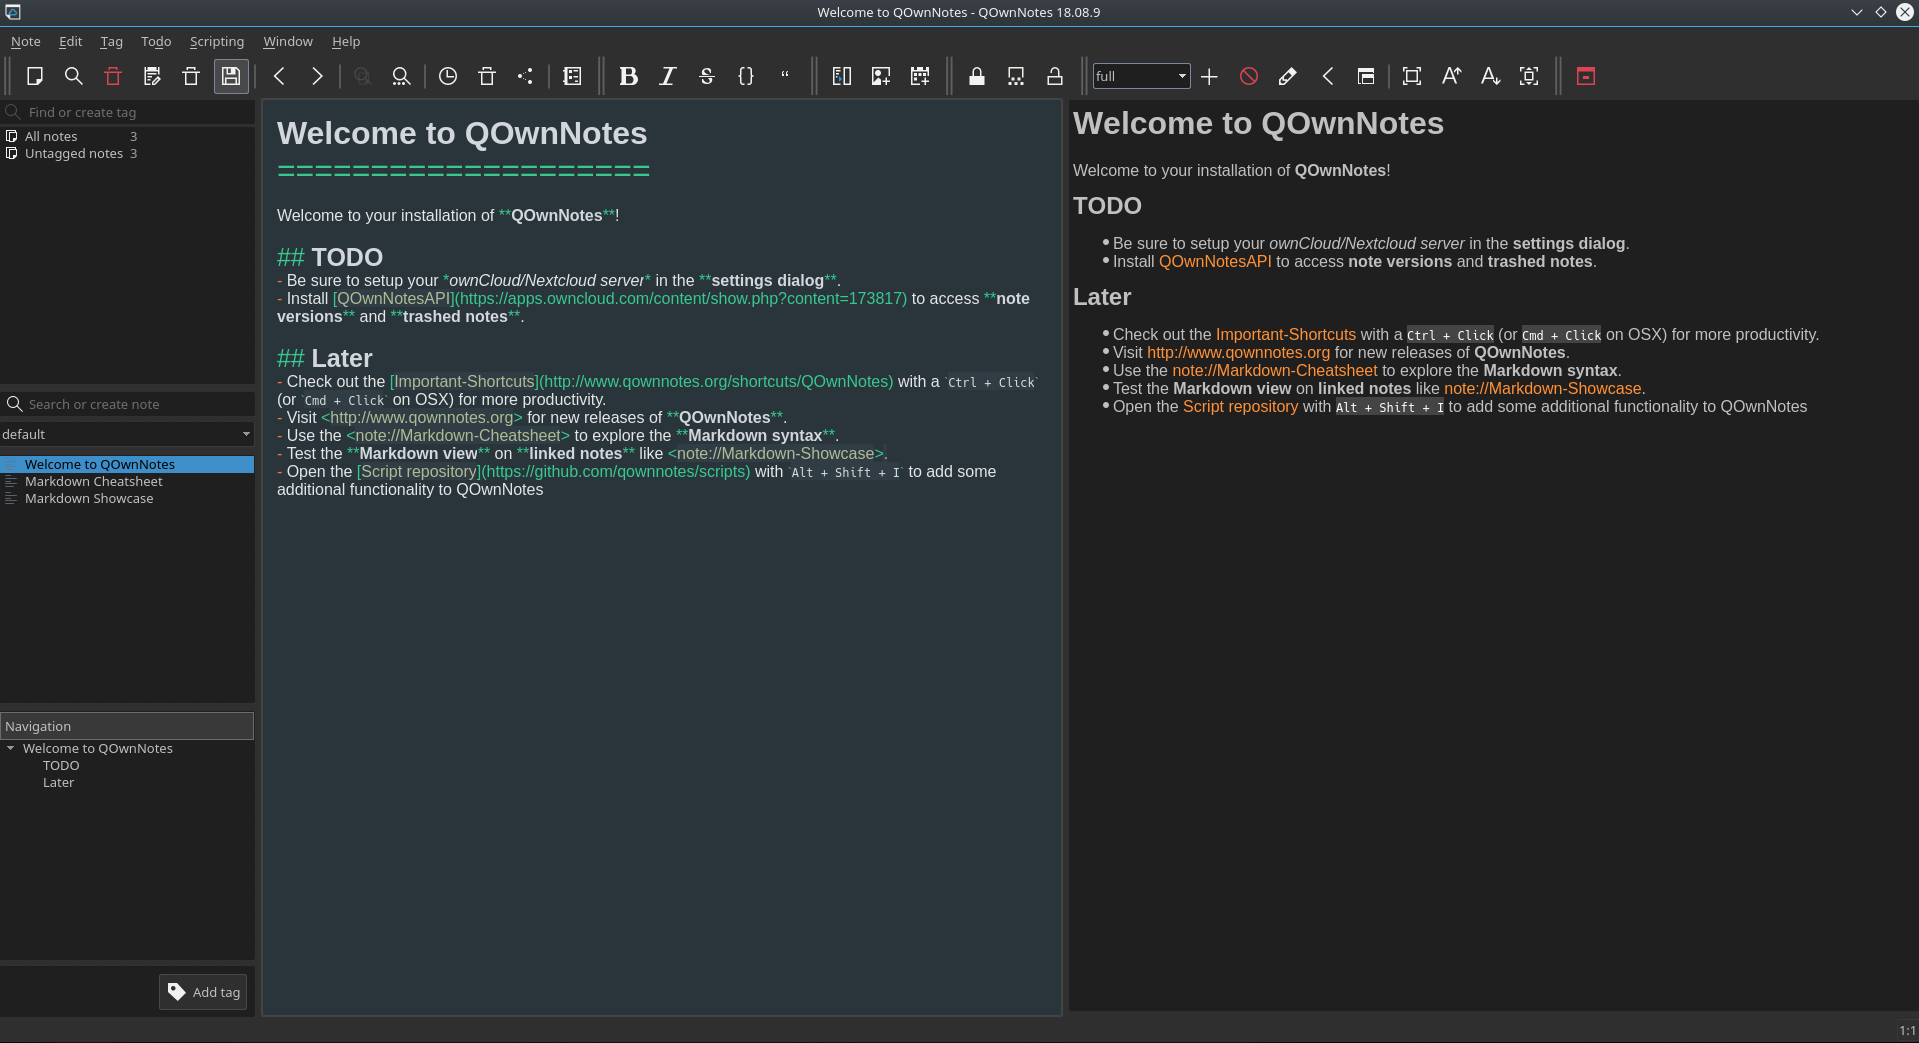
After restarting, I change to the Full workspace, which shows me the Markdown preview.
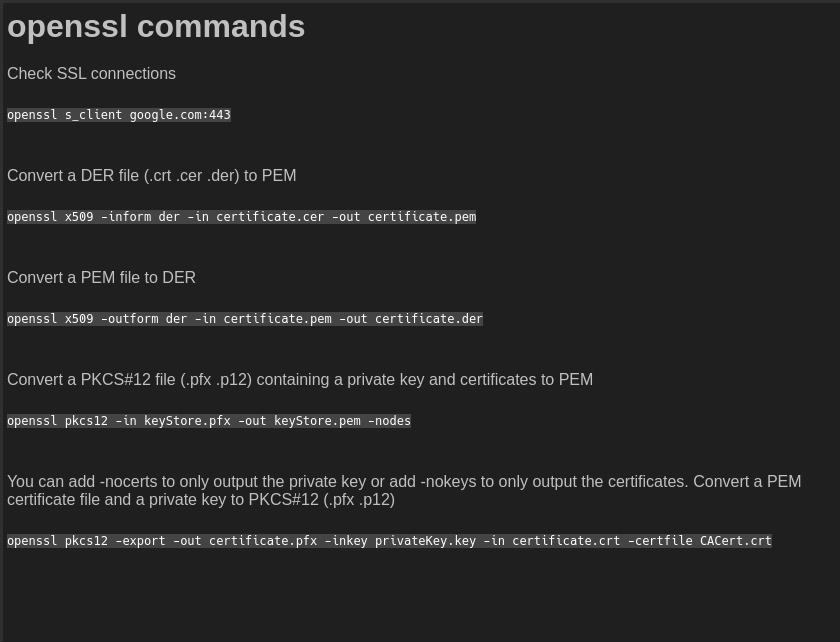
Now I can make that one note for the commands I ALWAYS look up – openssl